Sprinkler Selection and Settings
Sprinkler Selection and Settings
Sprinkler Selection and Settings
|
Menu:
|
Irrigation  Sprinklers Sprinklers
|
|
Toolbar Icon:
|

|
Before you can place a sprinkler on the design screen, you must select a nozzle from the database. You must then assign a symbol to represent the nozzle on the design. You can adjust the symbol color assignment, default pressure setting at the nozzle, the radius of throw or arc pattern assignment and more.
To select a sprinkler nozzle and adjust any settings:
-
Select the filtering method from the Filter Type drop down menu.
-
Click on the Manufacturer drop down menu and select the manufacturer of your choice.
-
Click on the Category drop down menu and select the category of sprinkler nozzles necessary for the design. The eight different category selections are Turf Sprays, Shrub Sprays, Shrub Risers, Turf Rotors, Shrub Rotors, Bubblers, Low-Volume and Golf.
-
The sprinkler nozzles selections associated with the chosen manufacturer and category will be displayed under the Sprinkler Selection header. Click on the desired nozzle selection one time with the left mouse button.
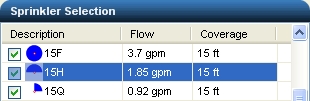
Selected 15H sprinkler nozzle
-
Before a nozzle may be placed on the design, a symbol must be assigned to represent the nozzle. Click on the drop down arrow to the right of the Symbol label to view the available symbol choices. Click one time on the symbol to assign to the selected sprinkler nozzle.
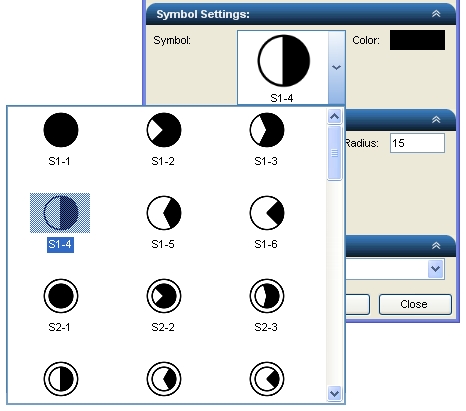
Click on the symbol to represent the selected nozzle on the design
-
To assign a to the symbol, click on the Color button. Click on the color of your choice or enter the Red, Green, and Blue values in the associated text boxes. Click on the OK button to accept the color assignment.
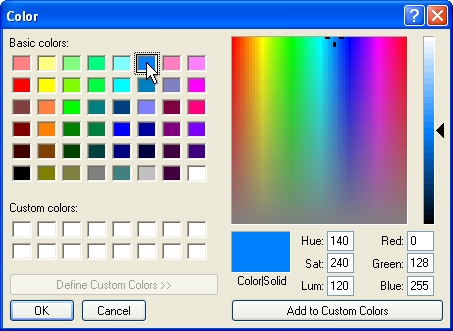
Select a color assignment and click on the OK button.
-
Select the default pressure assignment for the sprinkler nozzle by clicking on the Pressure drop down menu and clicking on the desired selection. The Flow and Radius of throw will change based on the selected pressure setting. The Flow is set in the database and cannot be changed.
-
The arc pattern drawn on the screen to represent the sprinklers wetted area may be adjusted downward by up to 25% of the maximum radius of throw. Place the mouse cursor on top of the Throttling slider bar  button. Press and hold down the left mouse button. Drag the cursor to the left to decrease the setting or to the right to increase the setting. Release the left mouse button once the desired setting is achieved. This setting will be saved with each nozzle selection in the database.
-
In addition to the Throttling adjustment, you can also adjust the Radius of throw if necessary by typing a new value in the text box. The arc pattern drawn on the screen to represent the sprinklers wetted area may be manually adjusted downward by up to 25% of the maximum radius.
-
Select an arc pattern assignment for the nozzle by clicking on the Arc Pattern drop down menu and clicking on the desired selection.
-
If the sprinkler nozzle is a valve-in-head sprinkler, click on the Valve-In-Head checkbox until a checkmark appears in the box.
-
Select the desired sprinkler body assignment from the Nozzle Body drop down menu. This selection determines the type of body you would like the sprinkler nozzle to be installed on. You may have different body assignments per sprinkler nozzle. Changes to this setting may be made at any time during the design process to allow for different bodies on the design. For example, you may want all turf spray nozzles installed on Rain Bird 1804-SAM-PRS bodies, while some shrub spray nozzles are installed on Rain Bird 1806-SAM-PRS bodies.
-
When placing sprinkler symbols, it may be necessary to offset the symbols to one side of the insertion point. This will prevent the symbols from being drawn directly on top of a line or curve and will give the drawing more clarity. To enter an offset distance, enable the Sprinkler Offset check box by clicking on the selection with the left mouse button until a checkmark appears in the box. Enter the distance to offset the sprinklers in the Sprinkler Offset text box.
This command may be used in conjunction with the Entity Snap command.
-
Click on the OK button to begin placing the nozzle on the design screen.
Note:
-
Set the cost associated with each piece of equipment, the part number and the tied assembly assignment in the Equipment Costs command.
-
You can download new product updates from the Update Database command.
-
You can turn the sprinkler arc patterns on or off in the Layer Manager by clicking on the Show Sprinkler Arcs checkbox.
-
Expand or contract sections as required.
Back to All Topics