Sprinkler Placement
Sprinkler Placement
Sprinkler Placement
|
Menu:
|
Irrigation  Sprinklers Sprinklers
|
|
Toolbar Icon:
|

|
The Sprinkler Placement command allows you to place irrigation sprinkler symbols on the drawing screen. You may place as many sprinklers on the drawing screen as necessary. The sprinkler nozzles are separated by manufacturer and category. The eight different category selections are Turf Sprays, Shrub Sprays, Turf Rotors, Shrub Rotors, Bubblers, Low-Volume and Golf.
To begin placing a sprinkler on the design:
-
Select the filtering method from the Filter Type drop down menu.
-
Select a Manufacturer from the drop down menu.
-
Select the Sprinkler Type or category from the drop down menu.
-
Select the sprinkler nozzle and adjust any settings as necessary.
-
Click on the OK button to begin the placing the nozzle on the design screen.
To place a single sprinkler symbol:
-
The arc pattern representing the wetted area of the sprinkler nozzle will appear in your cursor. The cursor will change to a plus (+) sign. Move the mouse cursor where the sprinkler nozzle should be located on the drawing and click one time with the left mouse button.
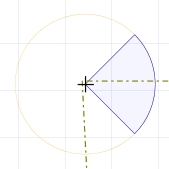
Click one time to set the sprinkler location
-
Rotate the sprinkler to the desired angle and click a second time to complete the placement process.
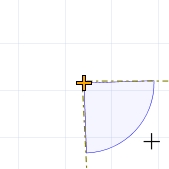
Rotate the arc pattern to the desired direction
-
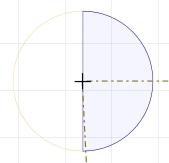
Another sprinkler of the same type will appear on the mouse cursor. Continue placing additional sprinkler symbols as necessary.
-
Press the Esc key to end the command and return to the Sprinkler Placement dialog box.
-
Click on the Close button to exit the dialog box.
To place multiple sprinkler symbols along a straight line:
-
The arc pattern representing the wetted area of the sprinkler nozzle will appear on your cursor. The cursor will change to a plus (+) sign. Move the mouse cursor to one end of a straight row and click one time with the left mouse button.
Click on one end of a straight row of sprinklers
-
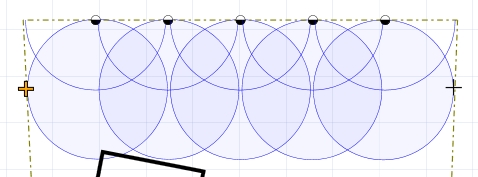
Drag the mouse cursor to the opposite end of the row. Sprinkler arc patterns will be added to the row as the length increases. The first symbol and arc pattern will be removed from the row. The symbols will be spaced evenly along the row. If you hold down the Shift key while dragging the mouse cursor, the sprinkler symbols will be spaced at exact nozzle to nozzle spacings.
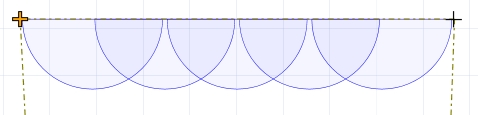
Sprinkler arc patterns are added as the row increases in length
If the points are set from right to left, the sprinklers will appear facing downward.
If the points are set from left to right, the sprinklers will face upward.
If the points are set from top to bottom, the sprinklers will face toward the left.
If the points are set from bottom to top, the sprinklers will face toward the right.
If the sprinkler symbols are facing in the wrong direction, press the F key to flip the direction 180�.
-
Click a second point to complete the process and place the symbols. Continue placing additional sprinkler symbols as necessary.
Continue to place additional rows of sprinklers
-
Press the Esc key to end the command and return to the Sprinkler Placement dialog box.
-
Click on the Close button to exit the dialog box.
To place a variable arc nozzle (VAN) on the screen:
-
Move the mouse cursor where the sprinkler nozzle should be located on the drawing and click one time with the left mouse button. You will not see anything on the design screen.
-
Click a second point to set the beginning of the arc pattern. You do not need to be concerned about the radius. The software will automatically begin drawing the arc pattern at the correct radius distance.
-
Move the cursor in a counter-clockwise direction.
-
Set the third point to set the end of the arc pattern.
Note:
-
Holding down the Shift key while dragging the mouse cursor will force the sprinkler symbols to be spaced at exact nozzle to nozzle spacings.
-
Set the cost associated with each piece of equipment, the part number and the tied assembly assignment in the Equipment Costs command.
-
You can turn the sprinkler arc patterns on or off in the Layer Manager by clicking on the Show Sprinkler Arcs checkbox.
-
Expand or contract sections as required.
Back to All Topics