-
Select the filtering method from the Filter Type drop down menu.
-
Click on the Category drop down menu and select a category to view the available plant selections. You can add, delete or rename the plant category names.
-
Click one time with the left mouse button on a plant selection. You can add, delete or rename the plants. You can also copy and paste plant information. The plant selections will be sorted alphabetically based on the common or botanical name as set in the Landscape Preferences dialog box.
-
If necessary, make adjustments to the Common Name, Botanical Name, and Abbreviation in the associated text boxes. The Abbreviation may be used in conjunction with the Quantity Label and Legend commands.
-
In the Plant Sizes area, select the size of the plant from the drop down menu. You may add, delete and rename the plant sizes by clicking on one of the available buttons. You may also copy and paste plant size information.
-
Before a plant may be placed on a design, you must assign a symbol or fill pattern to represent the plant material. Click on the Symbol Type drop down menu and select Symbol or Fill Area. A Symbol is normally used to represent individual plants while a Fill Area is typically used to represent ground-cover, annual color or turf areas.
You may assign separate symbol settings for each different size associated with the plant material, or you can have the same symbol settings for each different size. To assign the same symbol settings for each different plant size, click on Apply To All Plant Sizes until a checkmark appears in the box.
-
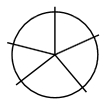
With the combination of Symbol Exteriors and Symbol Interiors, you can create a large number of symbols from just a few different drawings. For example, suppose you had two Symbol Exteriors consisting of a circle and a square. You have two Symbol Interiors consisting of a cross and a horizontal line. You now have six different symbol combinations - a plain circle, a circle with a cross inside, a circle with a horizontal line inside, a square, a square with a cross inside, and a square with a horizontal line inside. With the capability to also add a solid fill, gradient blend or hatched fill and the ability to add a rendered background texture, you can easily see where you can have a large number of possible symbol combinations from just a few basic drawings.
If Symbol is selected as the Symbol Type, click on the drop down arrow to the right of the Symbol Exterior and Symbol Interior labels to view the available choices. Click one time on the symbol to assign to the selected plant material.
To assign a to the symbol, click on the Symbol Color button. Click on the color of your choice or enter the Red, Green, and Blue values in the associated text boxes. Click on the OK button to accept the color assignment.
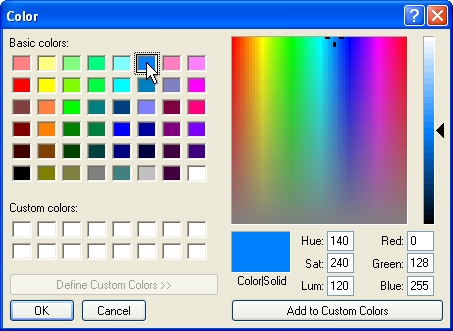
Select a color assignment and click on the OK button.
Enter the radius of the plants canopy in the Radius text box. The radius is equal to 50% of the diameter. For example, if a plant has a canopy with a 10 foot diameter, enter 5 for the radius.
Enter the desired distance between plant symbols in the Spacing text box. The distance is measured between the center of one plant symbol to the center of the next closest plant symbol. If a plant symbol has a radius of five feet and you would like the symbols to touch but not overlap, set the spacing value to ten feet or greater.
-
If Area Fill is selected as the Symbol Type, click on the Layout drop down menu and click on the desired spacing layout. This selection will be used to assist in calculating how many plants are located within the area for material list or estimate purposes.
Enter the desired distance between plant symbols in the Spacing text box. The distance is measured between the center of one plant symbol to the center of the next closest plant symbol. If a plant symbol has a radius of five feet and you would like the symbols to touch but not overlap, set the spacing value to ten feet or greater.
-
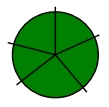
Select a fill pattern from the Fill Settings icons by clicking on a selection one time with the left mouse button. Fill patterns may be assigned to either individual symbols or fill areas. Below is a sample of the different setting types.
|
|
|
|
|
|
|
None
|
Solid
|
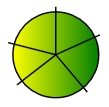
Linear Gradient
|
Radial Gradient
|
Hatch
|
-
Adjust the opacity of the fill color(s). Move the Slider Bar  , click on the up and down arrows, or type a value in the text box and press the Enter key to adjust the fill opacity or transparency.
|
|
|
|
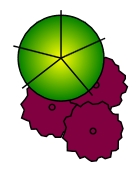
Opacity = 100%
|
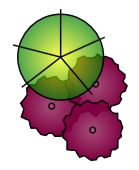
Opacity = 70%
|
-
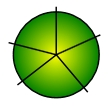
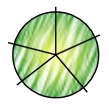
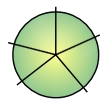
If Radial Gradient is selected as the fill pattern, adjust the center for the gradient by clicking inside of the Gradient Center. Hold down the left mouse button and drag the red plus sign to a new location. Release the mouse to reposition the center of the radial fill.
-
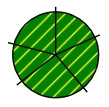
If Hatch is the chosen fill type, click on the drop down arrow to the right of the Pattern label to view the available symbol choices. Click one time on the pattern to fill the selected entity. Enter the angle for the hatching pattern in the Angle text box. Enter the scale of the pattern in the Scale text box.
-
In the Fill Render Settings, select a render setting from the Type drop down menu. Fill render settings may be assigned to either individual symbols or fill areas. Render settings apply a textured background to make symbols or areas look more hand painted or colored such as pencil sketching or water-colored. Enter the angle for the background in the Angle text box. Enter the scale of the background in the Scale text box.
|
|
|
|
Pencil Light
|
Water Color Light
|
-
If Template is chosen as the fill type, select a fill from the list of template settings.
-
Click on the OK button to begin placing the plant on the design screen.