Lateral Line Pipe Sizing
Lateral Line Pipe Sizing
Lateral Line Pipe Sizing
|
Menu:
|
Irrigation  Pipe Sizing Pipe Sizing
|
|
Toolbar Icon:
|

|
The Lateral Line Pipe Sizing command will size all lateral line within the selected zone(s) from each sprinkler symbol back to the control valve(s). The command will label all lateral line pipe or transitions from one size of pipe to another based on the Label Locations setting on the Sizing Options tab.
Before you may size lateral line it must meet the following criteria:
Lateral Line
-
Each sprinkler symbol must be assigned to a zone number using the Zoning command.
-
A control valve must be assigned to the zone number using the Zoning command.
-
Lateral line pipe must be connecting each sprinkler symbol with the appropriate control valve.
To automatically size lateral line on the design screen:
-
On the Automatic Pipe Sizing dialog box, click on the Sizing Options tab and adjust the settings as necessary.
-
On the Automatic Pipe Sizing dialog box, click on the Lateral Line Pipe tab.
-
Select each zone number to size in the Check Zones for Auto Pipe Sizing box, or click on All Zones. Click on each selection with the left mouse button until a checkmark appears in the box. A zone that has not been selected will not be sized. For example, in illustration one below, the lateral line for zones 1, 2, 3, 4, 7, 8, 9 and 12 will be automatically sized. The lateral line for zones 5, 6, 10 and 11 will not be sized.
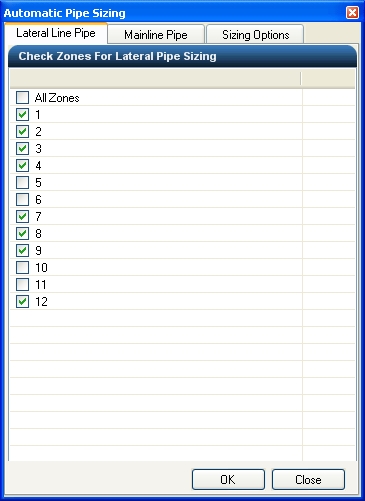
Checked Zones for Automatic Lateral Line Pipe Sizing
-
Once all zones to be sized are selected, click on the OK button to automatically size the lateral line pipe.
-
Click on the Close button to exit the dialog box.
Note:
-
Adjusting the velocity and pressure variance settings can greatly affect the sizing of pipe within the system. If the sizes are not satisfactory, you may click on the Sizing Options tab, adjust the settings, and resize the system until you are pleased with the results. If you are satisfied with part of the system but unsatisfied with other parts, you may resize smaller segments of the system. Simply select the zones to resize prior to enacting the automatic pipe sizing command.
-
The lateral line pipe will be broken into individual pieces of pipe between each sprinkler symbol and the control valve. In addition, the pipe will be broken at intersections usually formed by tee or cross fittings.
-
You can adjust the Pipe Connection Distance and the size and color of the pipe size labels on the design screen in the Options command on the Irrigation tab.
-
You can override the pipe size label location on the design screen using the Properties command. Select a piece of pipe and click on the Override Label Point checkbox. The pipe size label will attach to the mouse cursor. You can then place the label in a new location by clicking on the design screen with the left mouse button. To return the label to its original position, un-check the Override Label Point checkbox.
-
To remove a label from the design screen, erase the text to the right of the Label location in the Properties command.
-
You can manually adjust the line type or width of the lateral line pipe in the Layer Manager.
Back to All Topics