Drawing Page Setup
Drawing Page Setup
Drawing Page Setup
|
Menu:
|
File  Drawing Page Setup Drawing Page Setup
|
|
Toolbar Icon:
|

|
The Drawing Page Setup command allows you to create an imaginary sheet of paper on which to design. You may select the paper size from your exiting printer selections or you may enter a custom paper size. You can also select the orientation of the paper and set the paper margin. You can select from many common output scales or enter a custom scale setting. The command will allow you to create more than one sheet of paper for a design. Additional sheets may possibly be used for match lines, legends or installation detail drawings. The contents on a Master Sheet may be displayed on additional sheets to prevent the need to redraw the contents on each page.
To setup the drawing page:
-
Under the Sheet Settings title bar, enter the paper size in the Width and Height boxes and select the units of measurement from the Units drop down menu. You should always enter the width and height measurements as if you were looking at the sheet of paper in the portrait orientation.
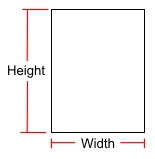
Paper in a Portrait Orientation
You can select a paper size from an existing printer driver by clicking on the Get Paper Size From Printer  button. Click on the drop down arrow to the right of the Select Printer label to view a list of the installed printer drivers. Select a driver from the list by clicking on the selection one time with the left mouse button. Select a paper size from the resulting list and click on the OK button.
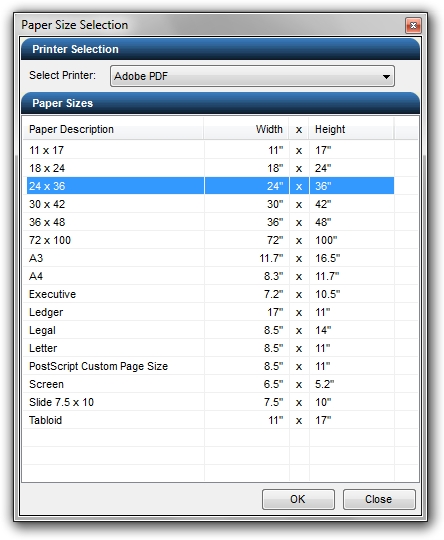
Select paper size from an existing Adobe PDF printer driver.
-
Click on either the Portrait  or Landscape
  orientation button to select the paper direction. The orientation of the paper along with the dimensions are displayed on the right side of the dialog box under the Sheet Working Area title bar.
-
Most printers cannot print all the way to the edge of a sheet of paper. A margin is usually set bordering the paper. Enter the margin for the paper in the Border Margin text box. The maximum border size is 1 inch.
-
The scale is a setting that represents one unit on the paper in relationship to x number of drawing units. For example, suppose the output sheet of paper is 8.5 inches by 11 inches. The drawing is created with the drawing units set to feet. If the selected drawing output scale is 1:10, this means every 1 inch on the sheet of paper is equivalent to 10 feet on the drawing. If the selected output scale is 1:20, every 1 inch on the paper will be equivalent to 20 feet on the drawing.
When entering the output scale for metric units of measurement, the paper is measured in millimeters while the drawing is created with the drawing units set to meters. To print to a scale of 1 meter of paper is equivalent to 100 meters of drawing units (1:100), the Scale in the Drawing Page Setup command would be entered as 1000 mm = 100 units or select 10:1 from the drop down menu. A scale of 1:250 would be entered as 1000 mm = 250 units or select 4:1 from the drop down menu.
Click on the Scale drop down arrow and select the desired output scale, or enter a value for the paper and drawing units for a custom scale setting.
-
Click on the OK button to exit the dialog box and accept the changes or the Cancel button to exit the dialog box and cancel the settings.
In some instances more than one sheet of paper may be required to complete a set of design documents. One or more sheets may be setup as a Master sheet while additional sheets are setup to show or display the Master sheet contents.
To create a secondary drawing page and set Master and Show Master characteristics:
-
Under the Drawing Sheets title bar at the top of the dialog box, click on the Add button or  icon to insert a new sheet into the current design project.

New Sheet added to current design project.
The new sheet will appear as a drawing page tab just above the Status Bar at the bottom of the page.
New Sheet drawing page tab.
When a sheet is added to the project it is marked as the current drawing sheet. The Current Sheet is indicated by the active sheet  symbol to the left of the sheet name and settings.
-
You may delete a sheet from the design project by selecting the sheet name in the list and clicking on the Delete button or  icon. This will delete the sheet and all entities that are on the sheet. You cannot undo this action.
-
You may rename a sheet by selecting the sheet in the list and clicking on the Rename button or  icon. Type the new name and press the Enter key on the keyboard.
-
You may mark one or more sheets as a Master sheet. If the box has a checkmark, the contents of the page will be considered the master contents. You can then mark other sheets to show or display the master sheet contents by clicking on the Show Master checkbox until a checkmark appears.
For example, you may draw a piece of property on a Property page and mark it as the Master. You can then create an Irrigation page and a Landscape page and mark each page as Show Master. The property will appear on all three pages without having to redraw the property.
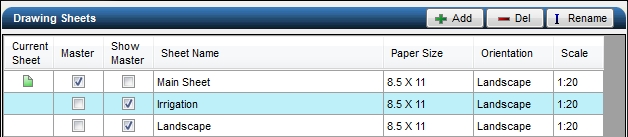
Multiple sheets marked as Master and Show Master
-
Click on the OK button to exit the dialog box.
On larger drawings that will not fit on a single sheet of paper, it may be necessary to setup additional sheets for printing purposes. This process will require that all irrigation or landscape designs be drawn on a Master sheet. It will also require the paper to repositioned on some sheets and the clipping area to be enabled and manipulated.
To setup multiple pages for printing purposes:
-
Under the Drawing Sheets title bar at the top of the dialog box, click on the Add button or icon and insert as many new sheets as required.
-
Rename each sheet by selecting the sheet in the list and clicking on the Rename button or icon.
-
Mark one or more sheets as a Master sheet and any other Show Master sheets as necessary.
-
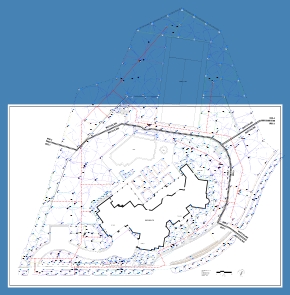
Notice that the irrigation design below appears 100% on one page but does not fit on the selected paper size at the selected output scale. This sheet will be marked as the Master Sheet.

Design not residing on one sheet of paper.
-
Create additional sheets as required to display all areas of the design and mark each sheet as a Show Master sheet. In this example, three additional sheets will be required.
-
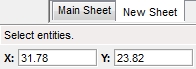
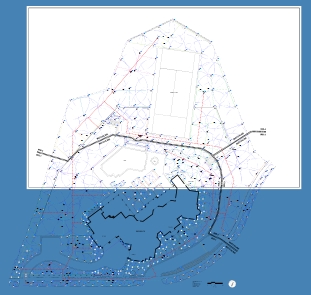
Enter an X and Y value in the Sheet Offset boxes or click on the Move Sheet  button to reposition each piece of paper behind the drawing as required.
 |
 |
 |
|
Sheet 1 paper position
|
Sheet 2 new paper position
|
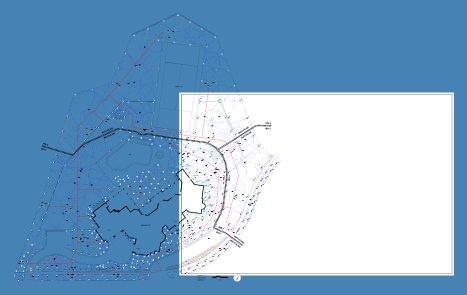
Sheet 3 new paper position
|
-
To display only the portion of the drawing on each sheet of paper, click on a sheet to make it the current sheet. The Current Sheet is indicated by the active sheet symbol to the left of the sheet name and settings. Click on the Enable Clipping checkbox until a mark appears in the box to enable the clipping area.
It is important to note that no entities will be visible outside of the clipping area on a Master sheet. The clipping area feature is intended for use on a Show Master sheet.
-
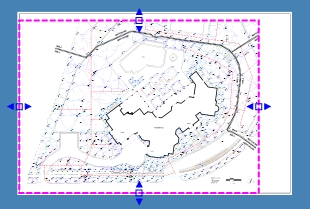
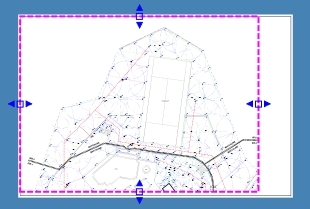
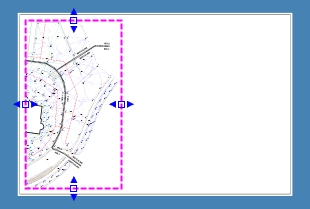
To set the clipping region, click on the Set Clipping Area  box. A colored box will appear along the page border and its grip locations will be highlighted with small square boxes and arrows to adjust the clipping area right and left
  and up and down
  . Click one time with the left mouse button inside of a small blue box. Move the cursor to a new location to adjust the size of the clipping area. Click one time with the left mouse button to set a second point to complete the process. Adjust all sides of the clipping area as necessary and press the Enter key to complete the command or press the Esc key to return to the Drawing Page Setup dialog without adjusting the clipping area.
 |
 |
 |
|
Sheet 1 with adjusted clipping area
|
Sheet 2 with adjusted clipping area
|
Sheet 3 with adjusted clipping area
|
 |
 |
 |
|
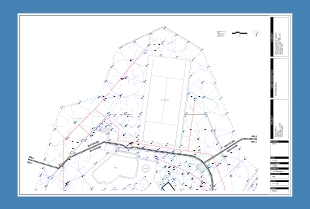
Sheet 1 complete with title block
|
Sheet 2 complete with title block and symbols
|
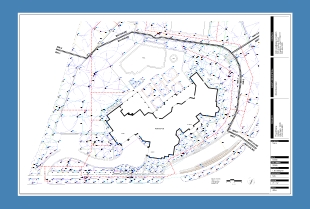
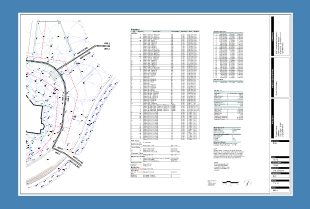
Sheet 3 complete with title block, legend and notes
|
Note:
-
The Drawing Page Setup command appears when you start a drawing by selecting New from the File menu or from the toolbar icon, or when you select New Custom Drawing from the Startup Screen.
-
The maximum margin size is 1 inch.
-
While creating a design, you can move or change from one sheet to another by clicking on the Sheet name in the tabs just above the Status Bar.
-
You can change the paper size, orientation, output scale, and any other settings at anytime during the design process.
-
No entities will be visible outside of the clipping area on a Master sheet. The clipping area feature is intended for use on a Show Master sheet.
Back to All Topics