Arc 3-Points
Arc 3-Points
Arc 3-Points
|
Menu:
|
Draw  Arc - Through 3 Points Arc - Through 3 Points
|
|
Shortcut Keys:
|
|
|
Toolbar Icon:
|

|
The 3-Point Arc command will allow you to draw an arc made up of the starting point, a point along the circumference through which the arc passes and the end point. A 3-point arc may be drawn in either a clockwise or counter-clockwise direction. Before drawing an arc, make sure you have chosen the correct layer assignment.
To draw a 3-point arc:
-
Click one time with the left mouse button to set a point for the beginning of the arc. The Anchor Point will be set at the center location.
-
Move the cursor to a new location. The angle and distance from the start point will be shown in the Status Bar at the bottom of the screen. Click to set a second point at the desired radius to begin the arc.
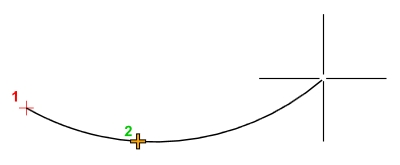
Start point 1 and pass through point 2.
-
Click to set the third and final point for the end of the arc pattern.
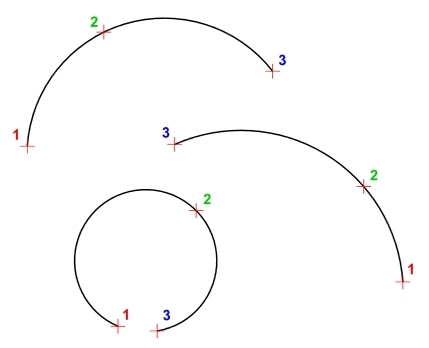
Possible 3-point arcs.
Note:
-
Pressing the Esc key before the second point is set will end the command.
-
Pressing the Esc key before the third and final point is set will back up one point.
-
If the Polar Angle is turned on, the arc will "snap" to preset angles based on the Polar Angle setting.
Back to All Topics